
Pumpkin Carving
September 21, 2023
Fall Recipes
September 25, 2023DIY Fall Wreaths
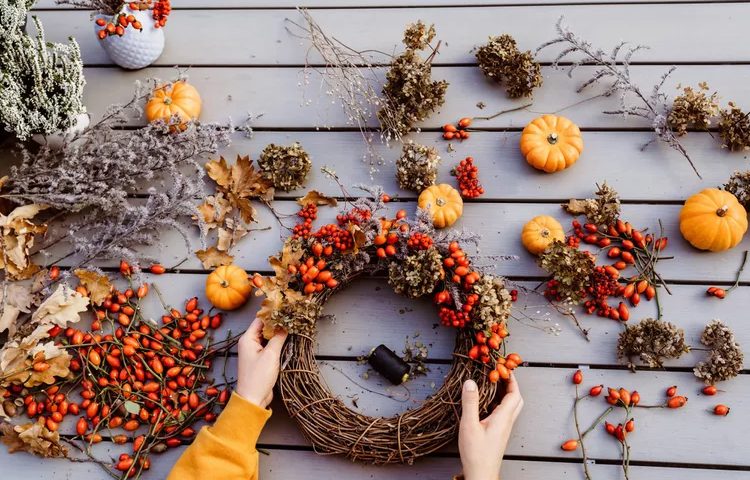
As the days grow shorter and the air turns crisp, nature paints a masterpiece with its vibrant hues of red, orange, and gold. It’s a time when the world undergoes a remarkable transformation, and what better way to embrace the spirit of autumn than by adorning your home with the warmth and charm it deserves? Crafting your own DIY fall wreaths not only invites guests with open arms but also pays tribute to the breathtaking beauty of the season. In this comprehensive guide, we invite you to embark on a creative journey through the world of fall wreaths, exploring various types, and providing detailed step-by-step instructions to help you infuse your home with the essence of fall.
Materials You’ll Need:
Before we dive into the wreath-making process, let’s take a moment to gather the materials you’ll require for these delightful DIY projects:
- Wreath Base: Your choice between a foam wreath form, a rustic grapevine wreath, or a sturdy wire wreath frame, depending on your aesthetic preferences.
- Faux or Real Fall Foliage: This can encompass a delightful assortment of leaves, berries, acorns, twigs, and more, which you can either purchase from craft stores or forage from nature itself.
- Floral Wire: Essential for securely fastening elements to your chosen wreath base.
- Hot Glue Gun and Glue Sticks: These will provide added stability and enable you to attach delicate items.
- Ribbon: To add a final touch of elegance and allow you to hang your wreath with pride.
- Decorative Items: Optional embellishments such as pinecones, miniature pumpkins, faux flowers, and more to unleash your creative flair.
Now, let’s embark on an inspiring journey through three distinct types of DIY fall wreaths and discover how to craft them with your own hands, infusing your home with the enchanting beauty of the season.
1. Classic Fall Leaf Wreath
Step 1: Prepare the Wreath Base
- Start with a foam wreath form or wire wreath frame.
- If using a foam form, wrap it in burlap or ribbon for added texture and to cover any gaps.
Step 2: Attach the Leaves
- Secure your faux or real fall leaves to the wreath base using floral wire or hot glue.
- Overlap the leaves, covering the entire wreath for a lush, full appearance.
Step 3: Add Accents
- Incorporate small pinecones, acorns, or berries to add depth and visual interest.
- Attach these items using hot glue.
Step 4: Finish with a Bow
- Create a bow using a fall-themed ribbon and attach it to the wreath.
- Make sure to leave enough ribbon at the top for hanging.
2. Rustic Grapevine Wreath
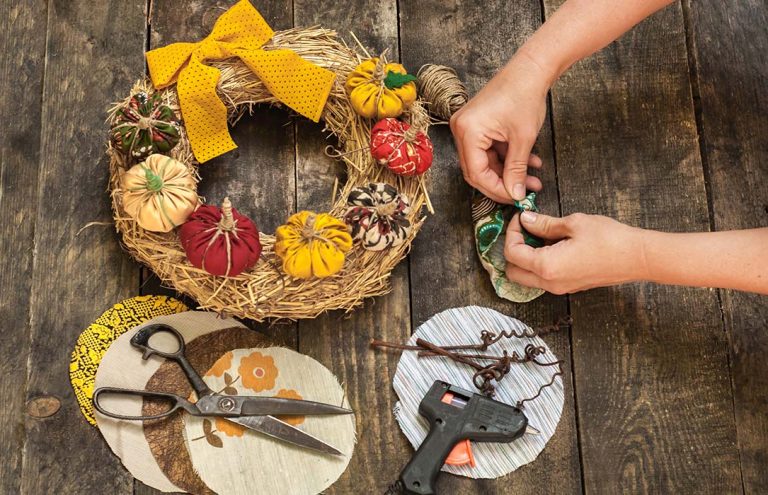
Step 1: Prep the Grapevine Base
- Start with a grapevine wreath as your base.
- Leave the vines exposed for a rustic look.
Step 2: Arrange Foliage
- Attach your fall foliage, such as leaves, twigs, and berries, using floral wire.
- Be creative with the placement, allowing some elements to trail along the wreath.
Step 3: Enhance with Decor
- Incorporate small pumpkins, faux sunflowers, or other autumn-themed items for added charm.
- Secure them with hot glue.
Step 4: Finish with a Ribbon
- Add a bow made from burlap or a coordinating ribbon.
- Attach it at the top for hanging.
3. Corn Husk Wreath
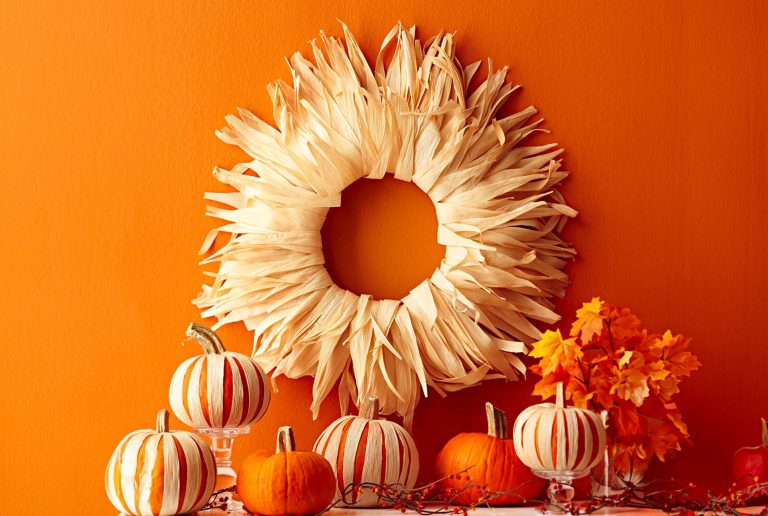
Step 1: Prepare the Corn Husks
- Soak dried corn husks in warm water for about 30 minutes until they become pliable.
- Pat them dry with a towel.
Step 2: Create Bundles
- Bundle a few corn husks together and secure with floral wire.
- Repeat until you have enough bundles to cover your wreath form.
Step 3: Attach Bundles
- Attach the corn husk bundles to a foam wreath form using hot glue.
- Overlap them to create a full wreath.
Step 4: Decorate
- Add dried Indian corn, small gourds, or other fall decor as accents.
- Secure them with hot glue.
Step 5: Hang and Enjoy
- Attach a ribbon loop at the top of your wreath for hanging.
4. Minimalist Pampas Grass Wreath
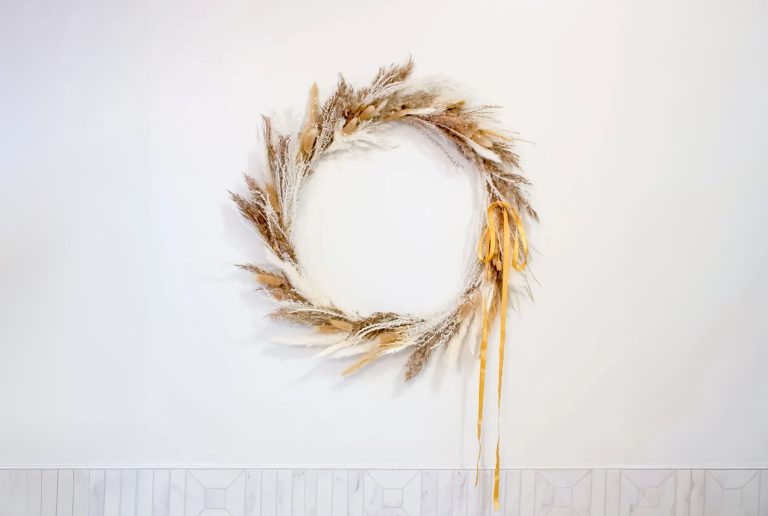
Step 1: Prepare the Pampas Grass
- Trim your pampas grass stems to the desired length. A mix of long and short stems can create an elegant and organic look.
- If your pampas grass is particularly fluffy, you can carefully trim and shape it for a more streamlined appearance.
Step 3: Assemble the Wreath
- Start by attaching the pampas grass stems to the wire wreath frame. Secure them with floral wire or a small amount of hot glue.
- Continue adding stems around the frame, layering them slightly for a full and balanced look.
- You can choose to cover the entire frame or leave some sections exposed for a minimalist touch.
Step 4: Finishing Touches
- Once you’re satisfied with the arrangement, check for any loose stems or areas that need extra security. Use additional floral wire or hot glue as needed.
- If you wish to add a ribbon for hanging, attach it to the top of the wreath.
Step 5: Display Your Minimalist Masterpiece
- Find the perfect spot to showcase your Minimalist Pampas Grass Wreath. It’s a wonderful choice for those who appreciate the simplicity and elegance of fall decor.
- Hang it on your front door, above a mantel, or even as a focal point in your dining room.
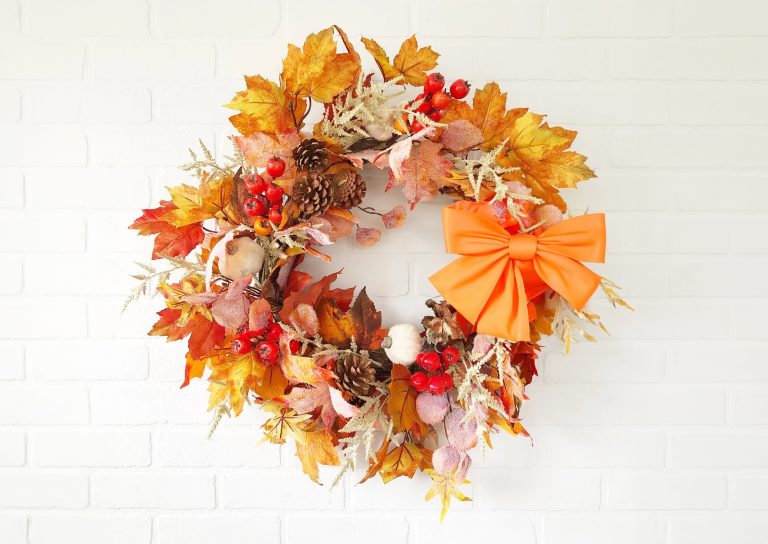
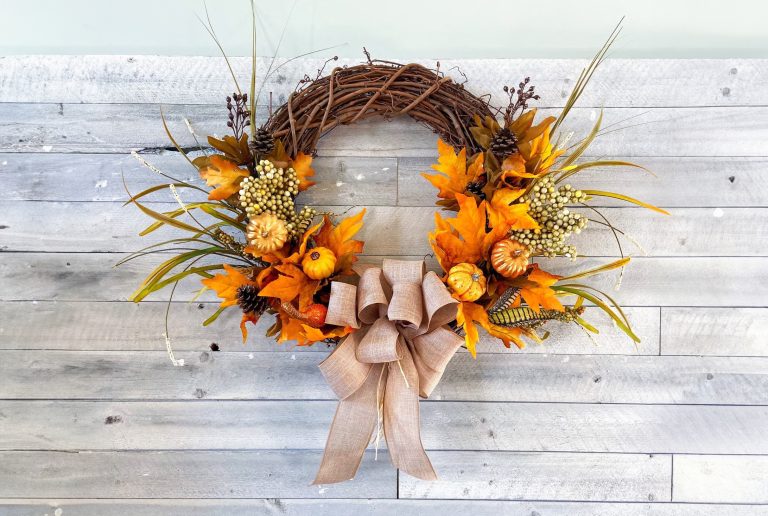
As we conclude our journey into the world of DIY fall wreaths, remember that each wreath you create is not just a decoration but a piece of your heart and creativity.
With every carefully chosen leaf, every delicate acorn, and every colourful ribbon, you’re not only bringing the beauty of autumn to your doorstep but also infusing your home with a sense of warmth and belonging. Your wreath will tell a story—a story of your love for this enchanting season, your creativity, and your desire to welcome friends and family with open arms.
So, hang your wreath proudly, and let it be a beacon of autumn’s splendour, a symbol of your craft, and a source of joy for all who pass by. Happy crafting, and may your fall be filled with endless inspiration and the cozy embrace of home.
Need more DIY wreath inspiration? Check out these great article with 58 unique wreath ideas!
Looking for more autumn decor ideas? Check out this blog post on Decorating For Fall!


